The Integrations Interface
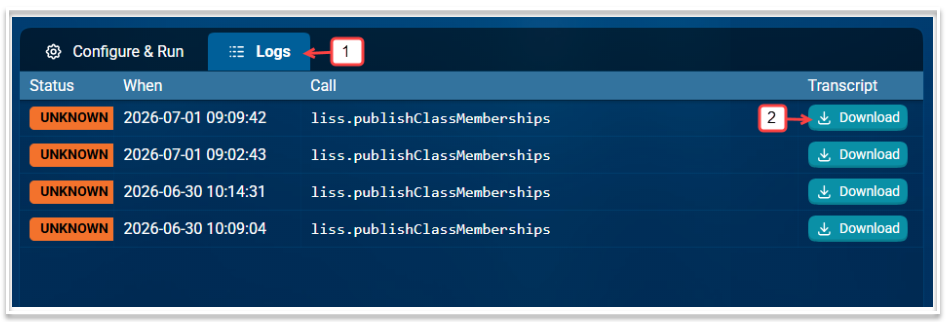
The interface for syncing data has been updated to improve the workflow. There are now two tabs; one for syncing and the other for perusing transcripts.
Configuration and Syncing
Navigate to File > Integrations to see the following screen.
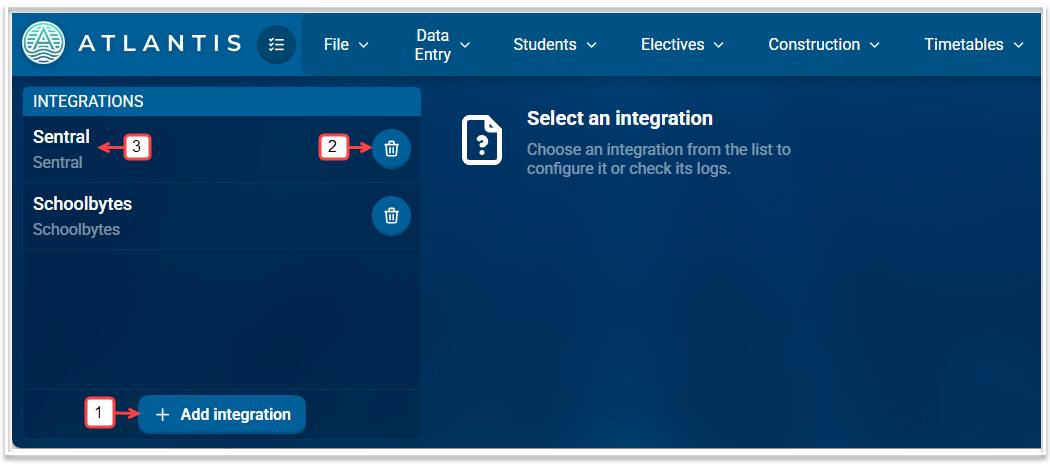
- Select 'Add integration' to create a new integration. See additional articles for creating integrations and syncing with Sentral, TASS, Edumate and Schoolbytes.
- Select 'the trash icon to remove an integration.
- To view the next screen, select the required system from the list in the Integrations panel
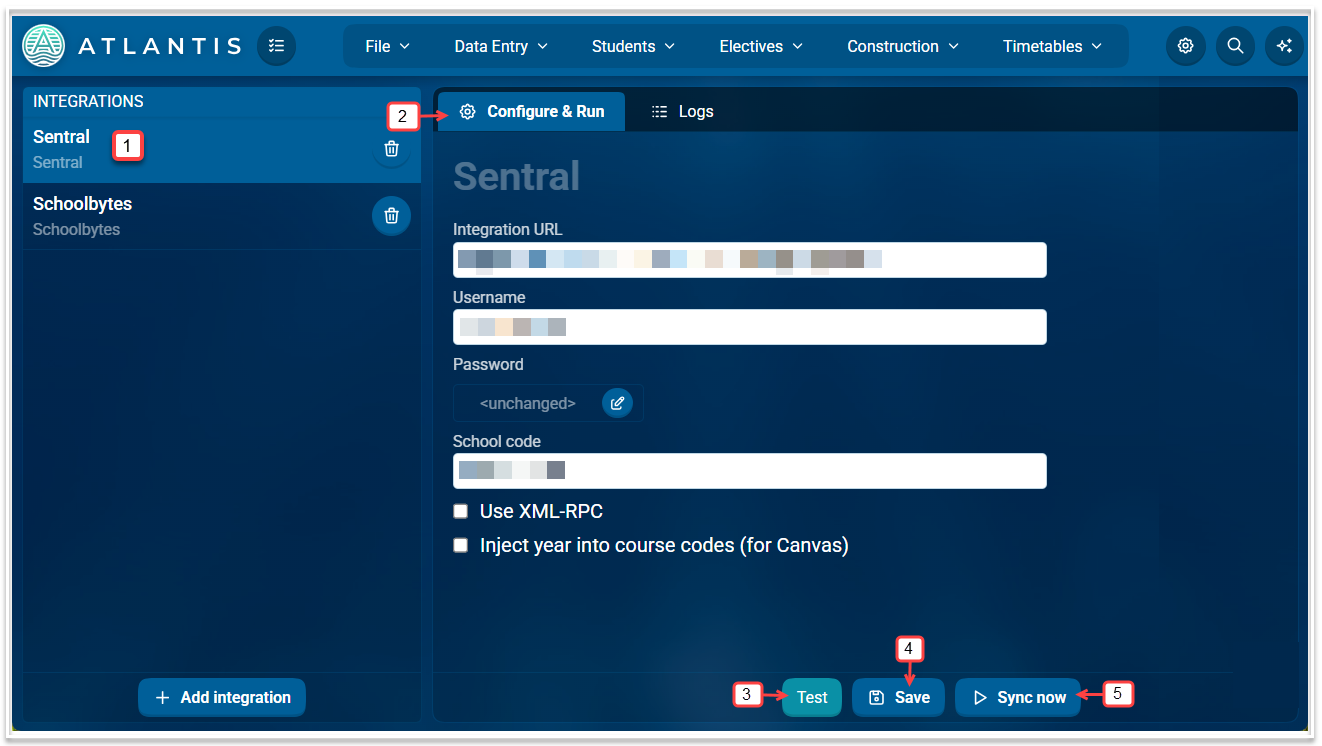
- The selected system is highlighted.
- The first tab, Configure & Run, is displayed, showing the setup for the selected system. Note that the configuration set up will be different for different systems.
- Use the Test button to check that the integration has been configured correctly.
- Use Save when any changes have been made to the configuration.
- Select Sync now to open up the sync dialog.
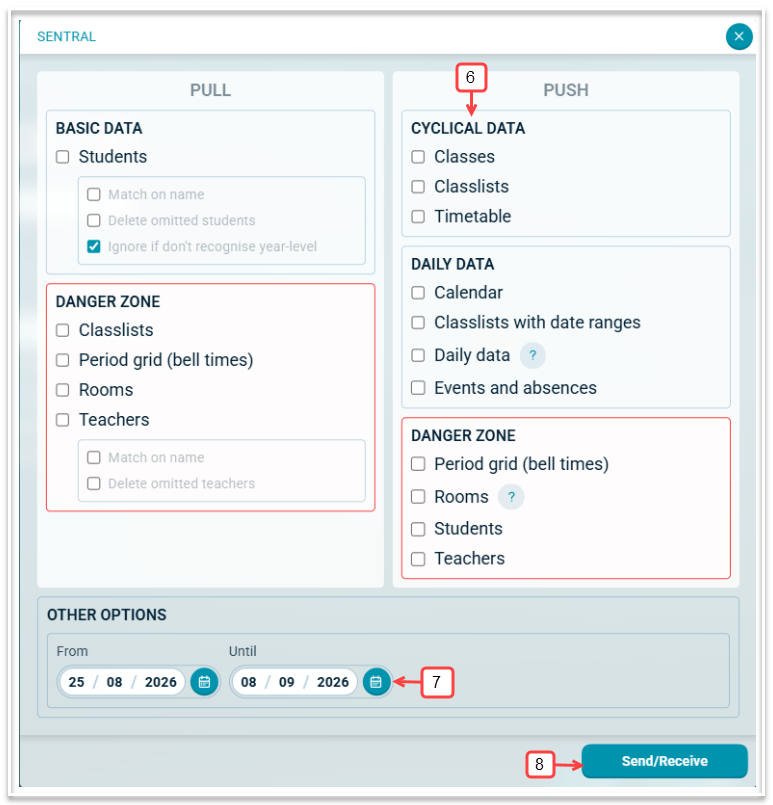
- Select the required calls. See this article for information on each of the calls.
- Select the date range.
- Select Send /Receive to complete the sync.
Sync Logs
- To peruse transcripts, select the second tab, Logs.
- To view a transcript for a particular sync, select the 'Download' button that corresponds with the required date, time and sync type.
- Open the downloaded text file to check what data was synced.