
Integration with Edumate
Setting up
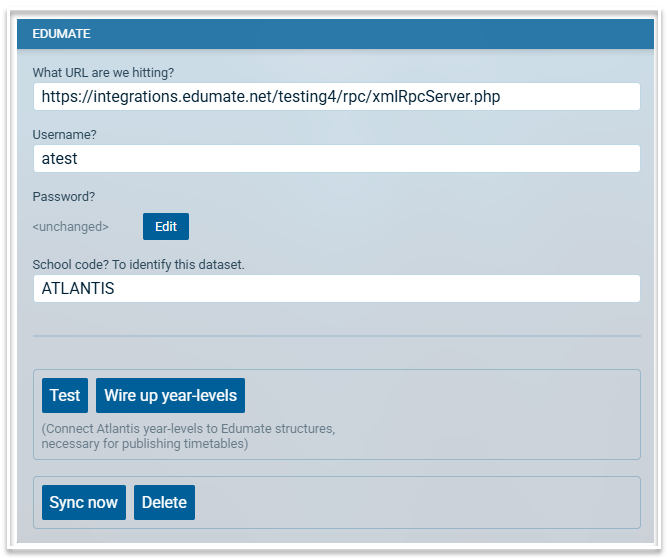
To create a connection to Edumate you will need the connection URL, a username, a password, and a school code. The format of the URL is
https://<schoolname>.edumate.net/<schoolname>/rpc/xmlRpcServer.php
The user associated with the username and password needs to have the appropriate level of permissions. If you have been using another timetabling product to publish timetable data to Edumate, we recommend you use the same credentials (username, password, school code) for this connection.
In Atlantis, go to File > Integrations, select Edumate from the dropdown list, select 'Create' and then complete the details. Here is an example:

If the user does not have the appropriate permissions, this message will be displayed:

Mapping Year Levels
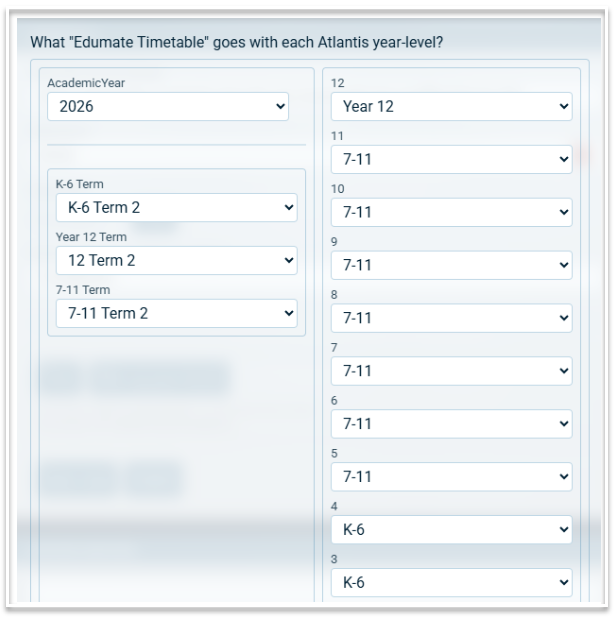
Upon successful connection, you will need to “Wire up year-levels”. This step defines a map between each Atlantis Year Level and an Edumate Timetable Structure.
Each school setup will be different. This is one example:
- We have the “Academic Year” 2026
- We have three timetable structures: K-6, Year 12, and 7-11
- We have all the Atlantis year levels.
Map each Atlantis year level to its Edumate Timetable structure:
Syncing
Once your year levels are wired up, hit [Sync now] to bring up the sync dialogue:
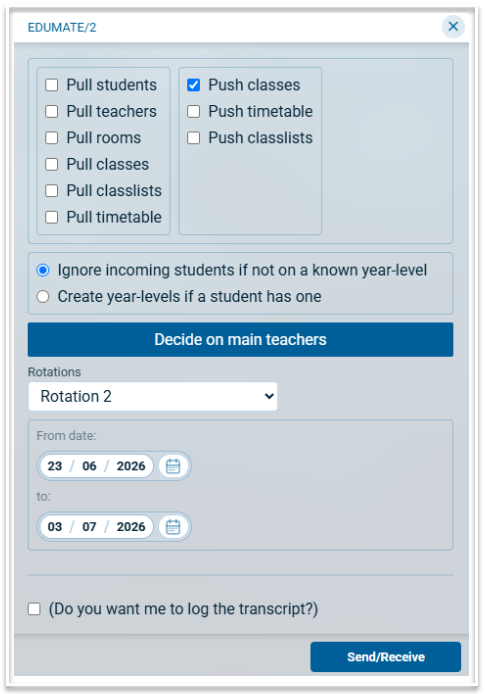
- Decide on what data you wish to Pull or Push. The context here is from the perspective of Atlantis.
a. Pull = Pull data from Edumate into Atlantis
b. Push = Push data from Atlantis into Edumate - Decide on main teachers. If you have job shares or split classes, you can decide which teacher should be sent to Edumate as the main teacher for the class. (By default Atlantis takes the teacher who teaches the class for the most periods, but in the case of a 50%:50% split you might want to specify which teacher is the “main” one.)
- Select which rotation you are working in
- Select your date range
- You may want to tick the [log the transcript] check box. This is helpful for troubleshooting if you want to look at the raw data yourself. However, Atlantis staff also have access to all the transcripts behind the scenes so most people will prefer to leave it to them.
- Hit [Send/Receive]
If Atlantis receives an error message from Edumate, we will display it now. Otherwise, if everything works, you will see a "Done" message.