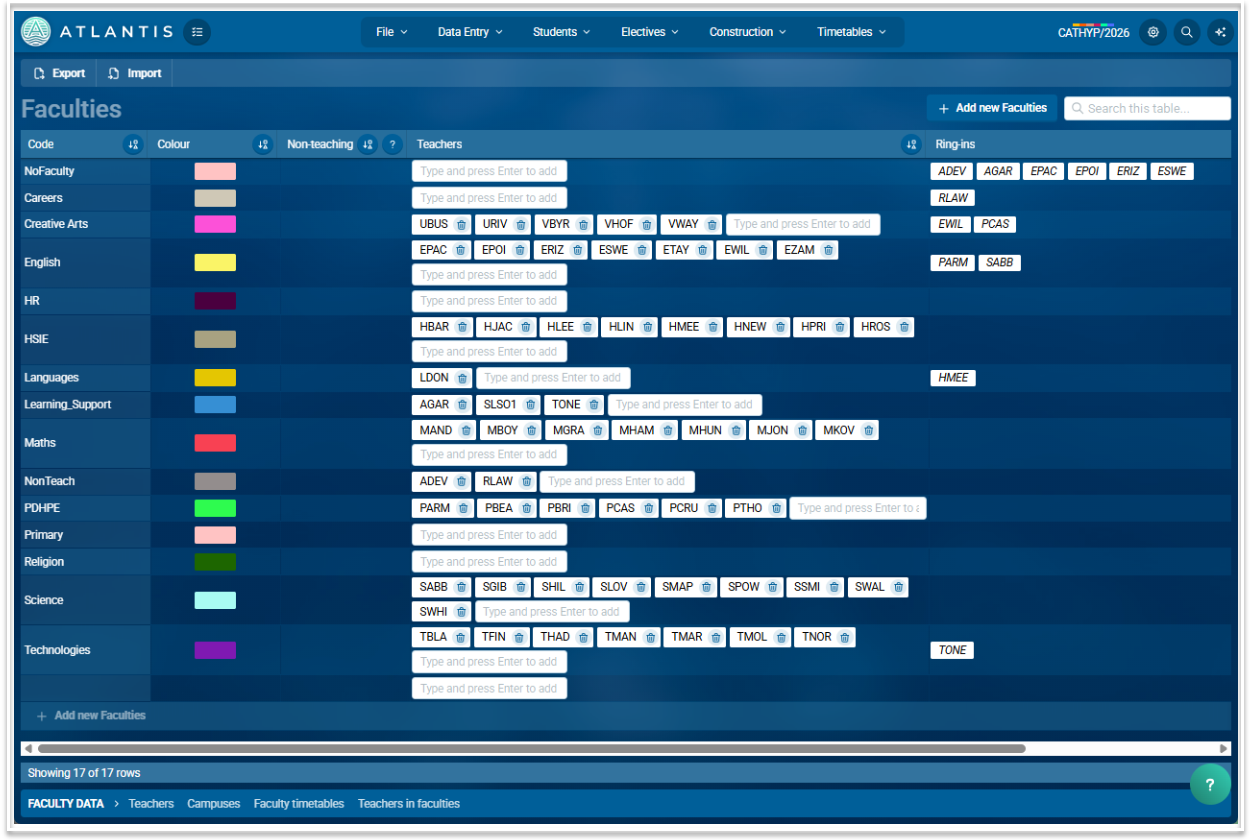
Faculties Screen
Teachers are assigned to their main faculty only. They can teach subjects from other faculties but can only be assigned to one.
The Faculties table
The faculties table has the following fields:
Code: Usually the name of the faculty but can be a short code if preferred e.g. Creative Arts or CA, Mathematics or MAT
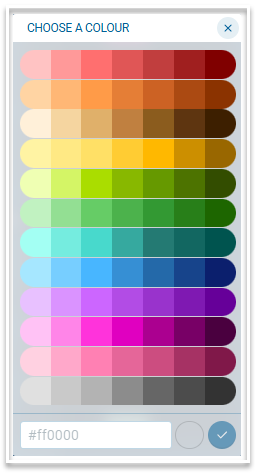
Colour: Select a colour via the colour selector to represent the teachers and courses that belong to each faculty. Use a hexadecimal code for a colour that does not appear in the selector. Give each faculty a distinct colour, as this will help when analysing your timetable in the Mosaic screen.
Non-teaching: Mark a faculty as non-teaching by entering Y in this column. Teachers in a faculty marked as non-teaching will not be shown when selecting cover staff in the Covers module.
Teachers: A teacher will be assigned to a faculty when their code is entered in this column. If a teacher is already assigned to a faculty, entering their code in a different faculty will remove them from the original faculty.
Ring-ins: This is a read only field and is automatically populated. Teachers who are in one faculty but are listed as an option for a course in a different faculty will appear as a ring-in in that faculty. For example, if PET is in the Maths faculty but is listed as an option for a Science course, they will appear as a ring-in in the Science faculty.
Entering, editing and viewing data
- Import data using a .csv file or manually enter your data.
- Make any change to any field of any entries by directly typing it in.
- Create a new entry by using the + Add new Faculties button at the foot of the table to enter data via the table. Use the + Add new Faculties button beside the search bar to add data via a modal.
- Sort on any column by clicking the sort icon next to the column heading.
Related screens can be accessed via the links in the footer. These are Teachers, Campuses, Faculty timetables and Teachers in faculties.