
The Courses Screen
Information related to courses is entered and maintained in the Courses table.
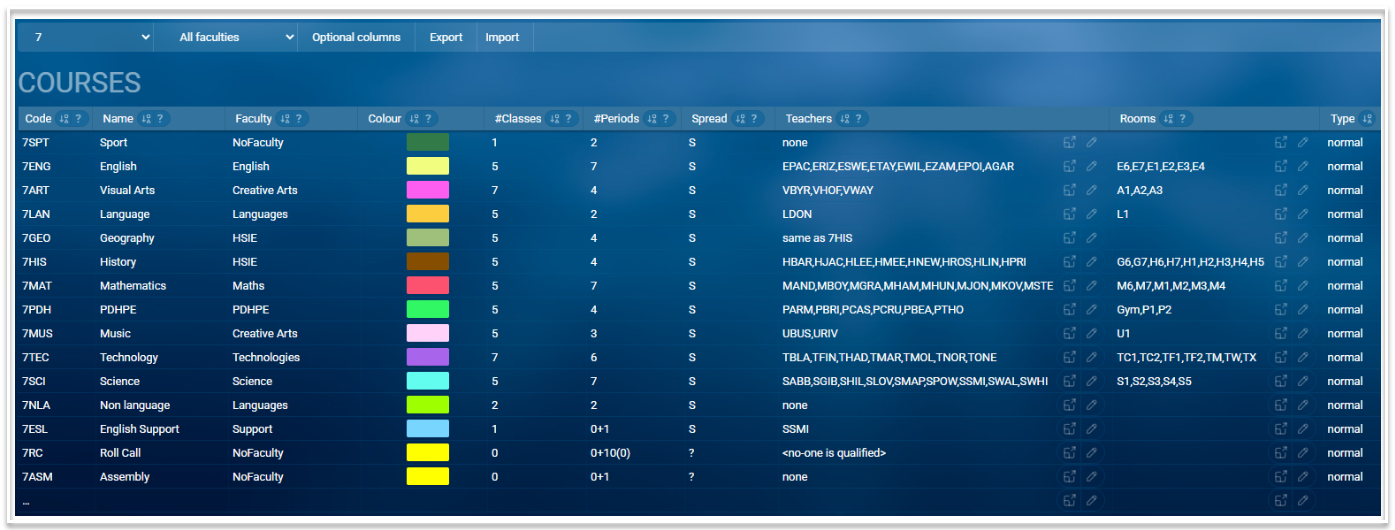
Table Columns
The Courses table contains the following columns. Those marked with * can be enabled via Optional columns.
- Code: A short mnemonic code to uniquely identify the course. It is recommended that the year level is used at the beginning of the code e.g. 11ECO
- Name: The full name of the course e.g. Economics
- Faculty:The faculty to which the course belongs
- Colour: This will default to the colour of the selected faculty but can be changed
- #Classes: The number of classes that are required for the course in the selected year level.
- #Periods: The number of periods per cycle each class in the course will be allocated on the timetable. This can be changed per class via the Period column in the Classes table.
- Spread: This field lets you specify hard or soft constraints on the arrangement of periods this course is timetabled with. For example, do we need two double periods? Examples of the syntax that can be used include:
"anything" : Anything goes
"S" : All single periods
"D" : Need exactly one double
"DD" : Need two double periods
"d" : We're happy with either 0 or 1 double periods
"Dd" : 1 or 2 doubles
"DDDdd" : At least 3 doubles, at most 5.
This can be changed per class via the Spread override column in the Classes table. - Year*: The main year level associated with this course. This would, in most cases, match the numerical prefix of the code.
- Teachers: Here you describe the set of teachers who are options to teach this course. You list them in a comma-separated list using their mnemonic codes. Any time you list a teacher who is not a preferred teacher for this course, put their code in brackets. You can also use two levels of brackets if it's really an 'if desperate' situation. All teachers with the same level of brackets are considered on the same level, so there is no meaning in the sequence you put the teachers, only in the brackets. You can also use a special syntax: same as <coursecode> to refer the algorithms to another course so you don't have to type in the same long list of teacher codes twice. You can also use the teacher picker via the pencil icon to make your selections. Clicking a teacher code once will add them as a preferred teacher. Clicking a teacher code twice will add them as a fallback teacher. To see the names of the teachers in the set, use the icon to the left of the pencil.
- Rooms: What rooms are options for this course? This column has the same syntax as 'Teachers'. You can also use the room picker via the pencil icon to select rooms. If you see this cell coloured dark red then it means there's an error - the course is requesting a room in the wrong campus, comparing the campus of the course's year-level with the room's campus.
- MaxStudents*: The maximum number of students per class of this course.
- Type: The default for type is normal but can be changed to rollgroup, staffmeeting or extracurric if required.
- ExternalId*: This can be the code assigned to the course by the relevant government education authority such as the NESA code.
- Exportable*: The default here is blank meaning Yes. Add N to exclude the course from a SIS sync.
- UkLevel*: For UK schools only
- GUID*: This is a globally unique identifier, automatically generated by the system.
- Notes: A free text field to add any information relevant to the course.
Additional information
- To add a course, enter data in the last row of the table.
- Courses can be filtered by years and faculties.
- Course data can be exported as a csv file using the Export button.
- Data can be imported using a .csv or .xlsx file. To import data, select the 'Import' button then drag the file onto the screen, matching column headers where necessary. Use one of the import options (Update, All new entries or Merge with existing data) to complete the import.
- The table can be sorted on any column by clicking on the sort icon in the column header. Blank fields will be displayed at the top.
- Columns can be resized.
- The Search bar can be used to find and filter data in the table.
- Related screens can be accessed using the links in the footer.